Saturday, December 24, 2011

Double Period Project 1812 / 1912 Shirtwaist

The pictures below were part of the inspiration to try shirtwaist tucks for the 1912 tailored suit.  I liked the large picture at the front. From the many pictures that I looked at from 1912, there were common elements that were present in most shirtswaists at this time.  Actually, in the clothes from this period. In my humble observation, there was an abundance of layering.  You see this layering in day clothes as well as evening gowns, material, patterns, over patterns.  The front and center shirtwaist below is layered over another shirt or blouse.  You have the shirt with the tucks placed over a lace or pattern under shirt.  Also, there was lots of trim, and different types of trim used on the same outfit.


This was an actual shirtwaist from the time period, I liked the waist band at the bottom.  I have decided to all that to my shirtwaist.

An illustration of a shirtwaist from this period, again with tucks placed under the yoke and down the front of the waist.

I cut the linen and lace plaemat in two pieces.


Now, I need to trim out the center of the mat and I will use the lace for trim around the colloar and the sleeves.

A better view of the cut out lace.  I will have to carefully and creatively arrange the lace around the collar.

The laced has been pinned to collar and it have to be sewn by hand.  There is no way that I can use a sewing machine on this lace.

I had to match the lace to make it work for the sleeves.

Again handwork, but, I am pleased with the outcome.

The Shirtwaist is done, I did had the band at the bottom as you can see.

Double Period Project 1812 / 1912 Shirtwaist

It is amazing how quickly the time has gone by.  There are only a few short weeks left before the competition is over and I will have to submit my entry for this year's contest.  I have so much left to do.  I have to finish the 1912 tailored suit and put the last minute details on some of the other items  from the 1812 suit, namely buttons.  I hate buttons and I tend to put them off as long as I can.

Moving along, it's time for me to finish the shirtwaist. 

This is the material that I have selected for the shirtwaist.  I am toying with the cream colored linen and the chocolate brown linen.

Well, I decided to go with the light cream colored linen.  It really is a bit  darker than this picture.  With camera flash, it appears almost white.  When in reality, it more a yellowish beige.


I really had the dickens of  a time trying to decide on the style of shirt waist that I wanted. By this time in the project, the dreaded "Project Scope Creep" started to rear its ugly head. Finally, I settled on a shirtwaist with tucks.

My brilliant idea, or so I thought was to use the pattern from the camisole and alter it to make a shirtwaist. It already had the pattern lines for tucks, they just needed to be extended.

When you do tucks, it is better to cut the shirt front after you have sewn the tucks, cutting it before the tucks never quite lay correctly.

I am pretty pleased with all of the tucks that I had to sew. I think that there were ten on the front and four tucks on the back.


Part of this challenge for me, was for me to "use what I have on hand".  I had these four placemats that had this really elaborate trim.  The mats, I had never used.  I think that they were given to me.  Anyway, I thought that the decorate edges of the mats would make a perfect edwardian trim for the shirtwaist.

The sleeves for the shirtwaist.

Friday, December 9, 2011

Double Period Project 1812 / 1912

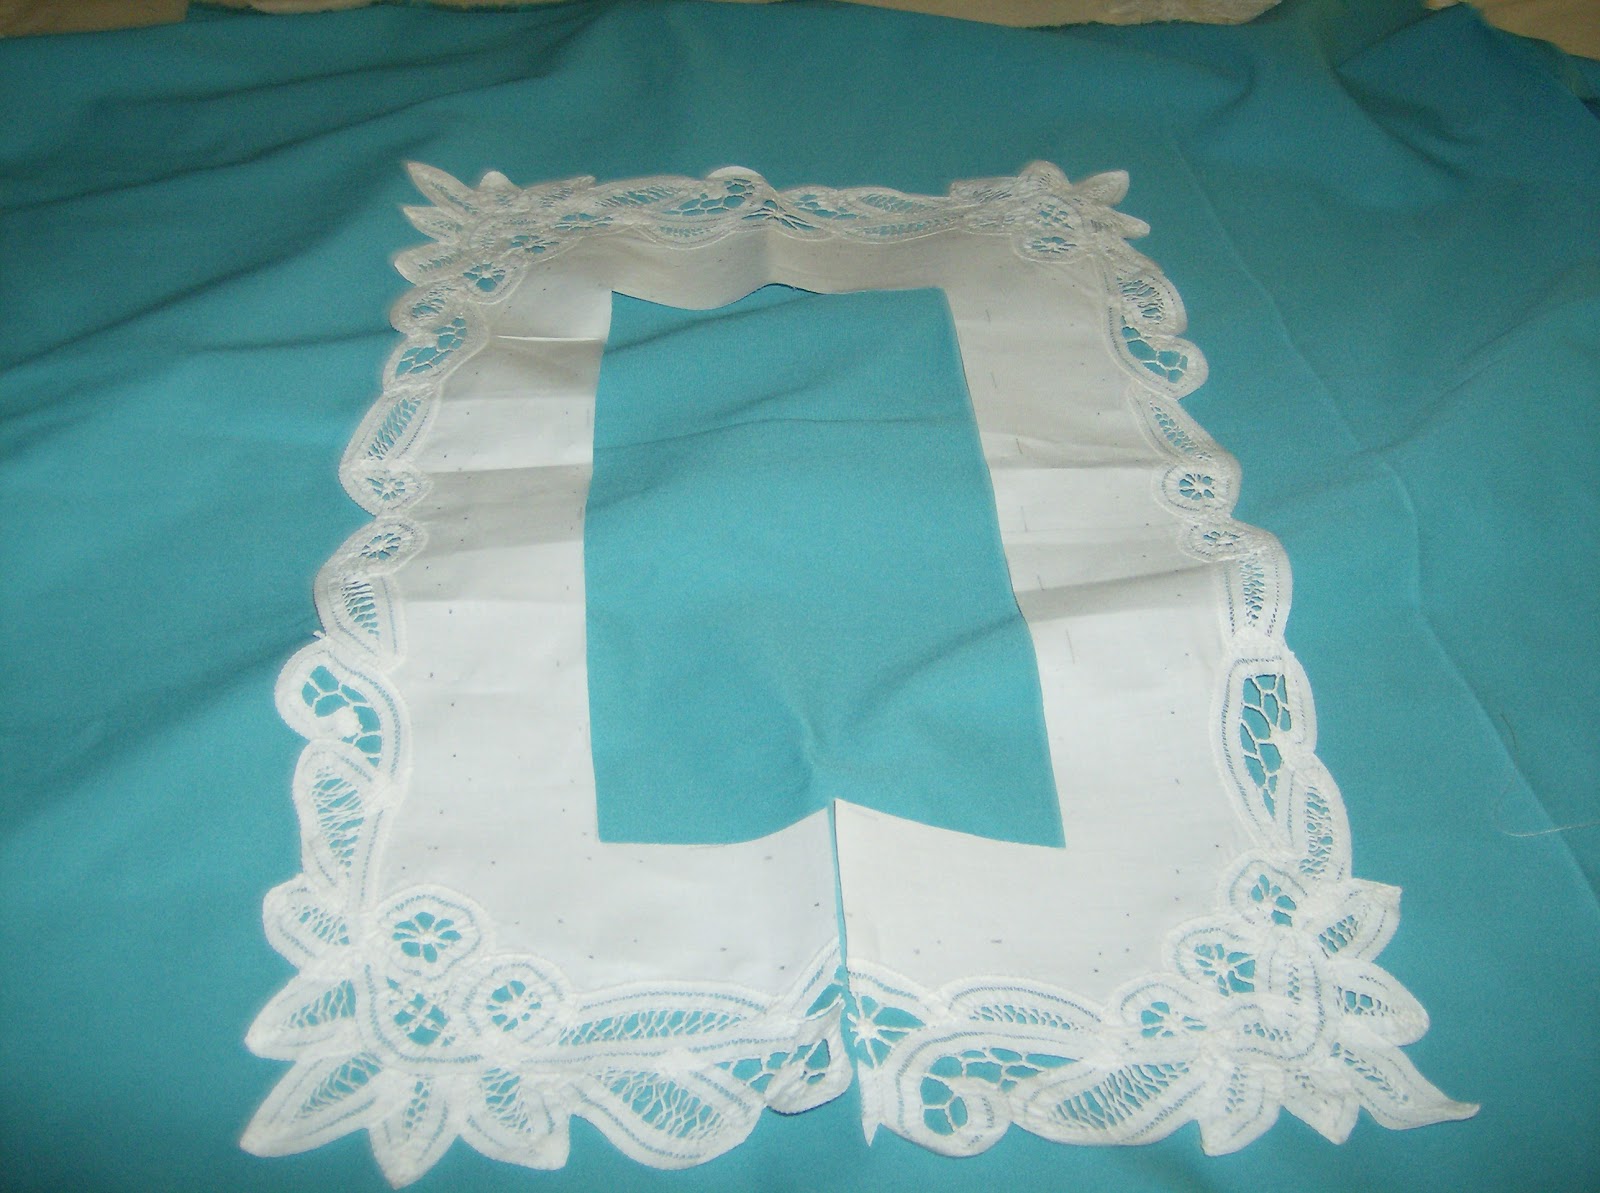
I did the lace insertions by hand.  For my first time attempting this type of insertion or any type of insertion for that matter. I am pretty pleased with the outcome. In the picture below, you can see that I have started to cut away the fabric behind the lace insertion on one side.

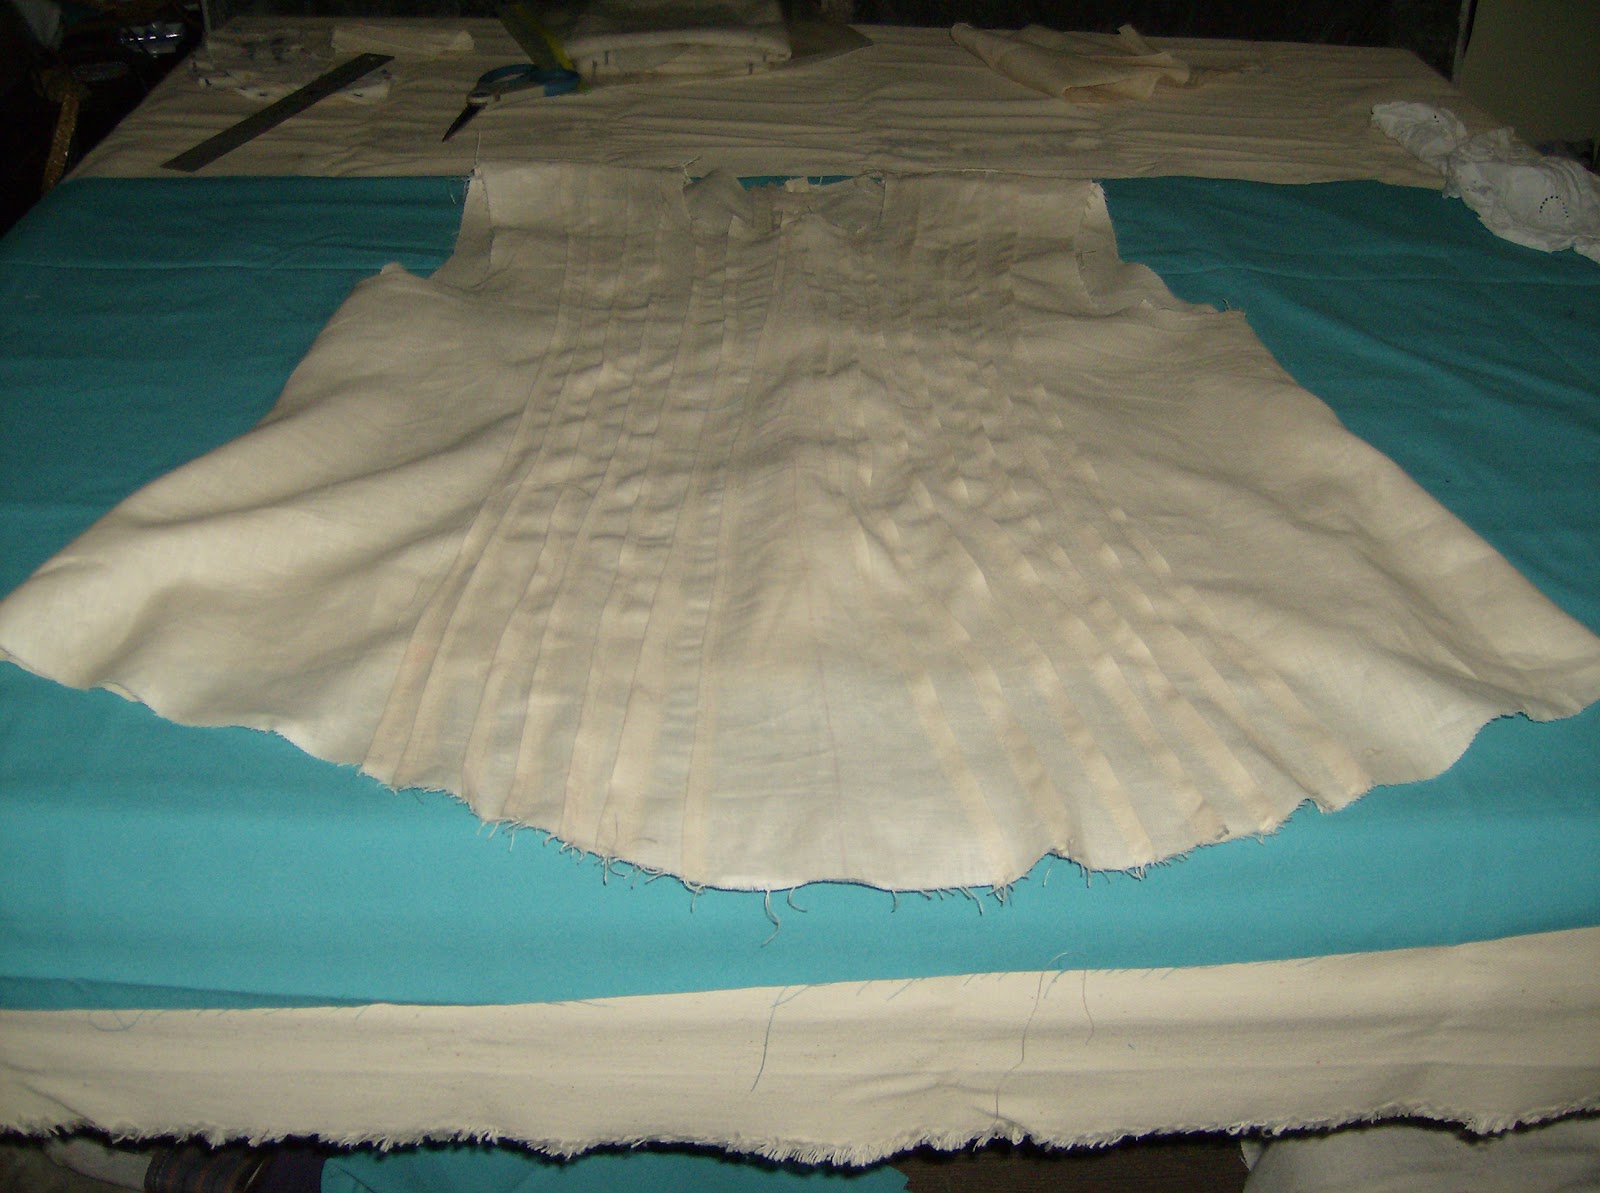
After the insertions were done, I moved on to adding the tucks. Again, this is something that I have never tried before. I was quite sure how they would turn out even with the instructions.  There was still a bit to figure out.  They are not perfect, but I can live with them.

A good view of the tucks and the insertions prior to me sewing the side seams.

I did a little more hand sewing to clean up the points at the bottom of the insertion.

Just a closer view of the camisole with the tucks and the insertions. I can't believe how lucky it was to have the lace be the exact width needed for the camisole.  Again, I would not allow myself to purchase anything, I had to use what I had on hand.

Side seams have been sewn. I decided to finish all of the seams with a zigzag stitch.  I still can get the hang of the french seam.  I know that it is suppose to be very easy, but it hasn't come together for me yet.

Waist ribbon drawing string has been added, you can clearly see it near the bottom of the camisole.

Almost there, it is coming together nicely.

It is done for the most part, I still have to add the front closures, buttons and buttonholes.  I plan to do those by hand and not use the sewing machine.

I am very pleased with the shape of the camisole.  At this time, the fronts were still very full and the back was a bit higher.  This you can see.

Closer view of the lace insertions, the tucks and the buttonholes.  You can see my handy work with the bottonholes.

Once again, the buttons I had on hand and used them from my stash.  They could have been a bit smaller, but I like them.

Buttons and more lace has been added to the front and back neck edge.  The pattern called for lace to be attached to the arm area as well.  I decided not to do that.  So, this piece of the project is completely down.

Double Period Project 1812 / 1912

I started making the 1912 outfit.  It is to be a 1912 tailored suit or jacket and skirt.  I was leaning toward making a gown, but decided to go in a different direction.

So, this is the pattern that I will be using to make the camisole.  There are lots of techniques involved that I have never done before.  Primarily, the tucks and the insertions. The pattern is a Folkwear Pattern.

The instructions are very clear and there tons to picutures to help illustrate the procedures.


The blue painter's tape does not harm the mock up material.  I needed to extend the bottom of the pattern. You can also see the markings for the tucks and the insertions.

Above is a better view of the pattern with tucks and the insertions clearly marked.


I took my time and attempted the insertions first.  Actually, I had a perfect piece of lace for the insertions.  It was on sale from JOMAR and I obtained it during the summer, a 5yard bundle for $1.  I wanted more, but they only had one bundle left. The lace was just about 1 inch wide, perfect.


Lace attached to the front pieces, it required a bit of hand sewing. I suppose, that I could have done this with a machine, but there was a lot more control doing it by hand.

There a total of six insertions, two for each front pattern piece and two for the back.